
The 4L60E is a popular GM automatic transmission introduced in 1993, known for its electronic controls and durability․ Swapping it to a manual transmission offers enhanced driver control and performance, making it a favorite among enthusiasts․ This guide provides a detailed overview of the process, helping you understand the benefits and steps involved in achieving a successful conversion․
1․1 Overview of the 4L60E Transmission
The 4L60E is a 4-speed automatic transmission introduced by General Motors in 1993, designed for rear-wheel-drive vehicles․ It features electronic controls, replacing the earlier hydraulic system, and is known for its reliability and versatility․ With a maximum torque capacity of 360 lb-ft, it is widely used in trucks, SUVs, and performance cars․ The “4L60E” designation refers to its 4 forward gears, longitudinal mounting, and 60 series torque rating; This transmission is popular among enthusiasts for its durability and compatibility in various applications, making it a common choice for swaps and upgrades․ Its electronic valve body allows for precise control, and it is often sought after for both stock and modified vehicles due to its robust design and performance capabilities․
1․2 Purpose of a Manual Transmission Swap
The primary purpose of swapping the 4L60E automatic transmission for a manual transmission is to gain greater control over the vehicle’s performance․ Manual transmissions eliminate the reliance on torque converters and automatic shifting, offering improved acceleration and fuel efficiency․ Drivers who prefer a more engaging driving experience often opt for this swap, as it allows for precise gear changes and better connectivity with the vehicle․ Additionally, manual transmissions are generally more durable and require less complex maintenance compared to automatics․ For racing or off-road applications, the ability to manually select gears can be a significant advantage․ This swap also appeals to enthusiasts who value the tactile feedback and driving satisfaction that only a manual setup can provide․ It is a popular modification among car enthusiasts seeking enhanced performance and a more hands-on driving experience․
1․3 Benefits of Converting to a Manual Transmission
Converting to a manual transmission offers several advantages, including improved fuel efficiency, lower maintenance costs, and enhanced driving engagement․ Manual transmissions eliminate the need for complex automatic components like torque converters and valve bodies, reducing weight and potential failure points․ Drivers gain precise control over gear shifts, which can improve acceleration and performance, especially in racing or off-road scenarios․ Additionally, manual transmissions are often more durable and require less expensive repairs compared to automatics․ The tactile feedback and direct connection to the vehicle’s mechanics make driving more enjoyable for enthusiasts․ Furthermore, manual transmissions typically have fewer electronic dependencies, simplifying diagnostics and repairs․ This swap is ideal for those seeking a more hands-on, performance-driven experience behind the wheel․

Key Considerations Before Starting the Swap
Assess mechanical aptitude, budget, and compatibility․ Ensure ECU adjustments and necessary modifications align with your vehicle․ Plan for tools, time, and potential challenges to avoid setbacks․ Proper preparation enhances success․
2․1 Vehicle Compatibility and Fitment
Ensuring your vehicle is compatible with the manual transmission is crucial․ The 4L60E is commonly found in GM vehicles, but swapping to a manual requires checking crossmember and driveshaft compatibility․ Measure the transmission tunnel to confirm fitment․ Some vehicles may need modifications to accommodate the new manual transmission․ Use a compatibility chart to identify suitable transmissions, such as the T-56 or NV3500, which are popular choices for swaps․ Verify the transmission’s length and bellhousing configuration to avoid costly adjustments․ Proper fitment ensures smooth operation and prevents mechanical issues down the road․
2․2 Reasons for Swapping to a Manual Transmission
Swapping from an automatic to a manual transmission offers several advantages․ Improved fuel efficiency and lower maintenance costs are significant benefits, as manuals generally require less upkeep․ Enhanced driving control and performance are key reasons for enthusiasts․ A manual transmission eliminates reliance on the 4L60E’s electronic controls, providing a more engaging driving experience․ Additionally, manual transmissions are often more durable under heavy use compared to automatics, making them a practical choice for high-performance or off-road applications․ Many drivers also prefer the direct connection to the vehicle that a manual provides, enhancing overall satisfaction and driving enjoyment․ These factors make swapping to a manual a desirable upgrade for both functionality and enthusiast appeal․
2․3 Mechanical Aptitude and Tools Required
A successful 4L60E manual transmission swap demands a strong mechanical aptitude and the right tools․ Essential tools include a transmission jack, socket set, wrenches, and a torque wrench․ Advanced tools like a hydraulic press may be needed for specific modifications․ Basic tools such as screwdrivers, pliers, and punches are also essential․ Mechanical skills like disassembling and reassembling components are crucial․ Experience with transmission systems and drivetrain modifications is highly recommended․ Without proper tools and skills, the swap can lead to costly complications․ Ensure all necessary tools are gathered, and consider consulting a repair manual or seeking professional help if unsure․ Proper preparation is key to avoiding technical challenges during the process, ensuring a smooth and successful conversion․
Understanding the 4L60E Transmission
The 4L60E is a four-speed automatic transmission introduced by General Motors in 1993, featuring an electronic valve body for improved shifting and durability․ Designed for rear-wheel-drive vehicles, it offers a reliable and versatile option for various applications, making it a popular choice for swaps and modifications due to its robust construction and wide compatibility․
3․1 Specifications and Features of the 4L60E
The 4L60E is a four-speed automatic transmission with a longitudinal design, suitable for rear-wheel-drive vehicles․ It features a maximum torque capacity of 360 lb-ft and is electronically controlled, offering precise shifting and adaptability to driving conditions․ Introduced in 1993, it replaced the earlier 4L60, adding electronic controls for improved performance and diagnostics․ The transmission is compact, with a short overall length, making it versatile for various vehicle applications․ Its robust construction and wide compatibility have made it a popular choice for swaps and modifications․ The 4L60E also includes a lock-up torque converter for improved fuel efficiency and reduced slippage during acceleration, enhancing both power delivery and drivetrain efficiency․
3․2 Differences Between 4L60E and Manual Transmissions
The 4L60E is an electronically controlled, 4-speed automatic transmission, while manual transmissions require driver input to shift gears using a clutch and gearshift․ Automatics rely on electronic controls for seamless shifting, offering convenience but less driver engagement․ Manuals provide direct control, often with more gears (5-6 speeds), enhancing performance and fuel efficiency․ The 4L60E uses a torque converter for smooth acceleration, whereas manuals use a clutch․ Manuals typically offer better acceleration and economy due to additional gears․ The 4L60E is compact, suitable for rear-wheel-drive vehicles, while manuals may vary in size and require adaptations like crossmembers and driveshafts․ Manuals involve mechanical complexity and driver skill, whereas automatics are user-friendly․ Both have different maintenance needs, with manuals usually requiring less complex servicing․ The choice depends on desired driving experience and performance requirements․

The Swap Process
The 4L60E to manual transmission swap involves several critical steps, starting with preparing the vehicle by draining fluids and disconnecting the battery․ Safely lifting the car and removing the automatic transmission is next, followed by installing the manual transmission․ Key modifications include adjusting the crossmember and driveshaft to fit the new transmission․ Installing a clutch and flywheel, routing the clutch cable, and connecting the shifter are essential tasks․ Testing and adjusting the setup ensures proper function, with a short drive to verify smooth gear shifts․ Budgeting for parts and tools is crucial, and planning for potential issues like compatibility or electrical problems is wise․ The end result is enhanced control and performance, making the effort worthwhile for driving enthusiasts․
4․1 Preparing the Vehicle for the Swap
Preparing the vehicle for a 4L60E manual transmission swap requires careful planning and organization․ Start by gathering all necessary tools, such as a transmission jack, socket set, wrenches, and a torque wrench․ Drain the transmission fluid to prevent spills during removal․ Disconnect the battery to ensure safety while working with electrical components․ Raise the vehicle securely using a lift or jack stands, ensuring it is stable before starting work․ Remove the automatic transmission carefully, using the transmission jack to support its weight․ Additionally, inspect and prepare the crossmember and driveshaft for modifications, as they will need to be adjusted to fit the manual transmission․ Organize all parts and tools in a clean workspace to streamline the process․ Safety gear, such as gloves and protective eyewear, is essential to protect yourself during the swap․
4․2 Steps Involved in the 4L60E to Manual Transmission Swap
The 4L60E to manual transmission swap involves several key steps to ensure a smooth conversion․ Begin by disconnecting the wiring harness from the automatic transmission to prevent electrical interference․ Next, remove the automatic transmission using a transmission jack, taking care to support the vehicle securely․ Once removed, install the manual transmission by aligning it with the engine and ensuring proper fitment․ Connect the clutch and flywheel, followed by the shifter and clutch cable, routing them appropriately․ Reinstall the driveshaft, shortened to accommodate the manual transmission, and adjust the crossmember for proper alignment․ Finally, reconnect the wiring harness to the manual transmission and test the setup to ensure all components function correctly․ Each step requires precision to avoid mechanical or electrical issues, ensuring a successful swap․
4․3 Necessary Modifications and Adjustments
Several key modifications and adjustments are required for a successful 4L60E to manual transmission swap․ The driveshaft must be shortened to accommodate the manual transmission’s length, ensuring proper alignment and balance․ The transmission crossmember may need to be modified or replaced to fit the new transmission’s mounting points․ Additionally, the clutch and flywheel must be installed, with the clutch cable properly routed and adjusted for smooth engagement․ Electrical modifications, such as reprogramming the ECU or installing a standalone controller, are often necessary to eliminate automatic transmission dependencies; The shifter and its linkage must be correctly aligned and secured․ Finally, the transmission tunnel may require modifications to accommodate the manual shifter, and the brake and clutch pedals may need adjustment for proper operation․ Each modification requires careful planning to ensure compatibility and optimal performance․
Tools and Materials Needed
- Essential Tools: Transmission jack, socket set, wrenches, torque wrench․
- Materials: Manual transmission adapter, clutch kit, flywheel, shifter assembly․
5․1 Essential Tools for the Swap
Completing a 4L60E manual transmission swap requires specific tools to ensure a smooth process․ A transmission jack is crucial for safely removing and installing the transmission․ Additionally, a socket set and wrenches are necessary for disconnecting components like the driveshaft and crossmember․ A torque wrench is essential for proper bolt tightening․ Other key tools include a clutch alignment tool, flywheel resurfacing kit, and shifter installation hardware․ For wiring adjustments, a wire harness crimper and multimeter may be needed․ Specialized tools like a transmission pan gasket scraper and gear lube pump are also recommended․ Ensure all tools are readily available to avoid delays during the swap process․
5․2 Recommended Materials and Parts
For a successful 4L60E manual transmission swap, specific materials and parts are essential․ A clutch and flywheel kit is necessary to enable manual shifting, ensuring proper engagement and disengagement․ Additionally, a manual transmission crossmember and shortened driveshaft are required to accommodate the new transmission․ A reprogrammed ECU or standalone transmission controller is crucial to eliminate automatic transmission dependencies․ A manual shifter assembly and clutch cable must be installed to control the new transmission․ Other key components include transmission fluid, pilot bearing, and wiring harness connectors․ Ensure all parts are compatible with your vehicle’s make and model to guarantee a seamless swap and optimal performance․

Compatibility and Interchangeability
Ensure the manual transmission is compatible with your vehicle’s make and model․ The T-56 or NV3500 are popular choices for a 4L60E swap, but modifications may be necessary for proper fitment and functionality․
6․1 Identifying Suitable Manual Transmissions for the Swap
Choosing the right manual transmission for a 4L60E swap is crucial for compatibility and performance․ Popular options include the T-56 6-speed, known for its strength and smooth shifting, and the NV3500, a 5-speed manual transmission that offers durability and ease of installation․ The NV4500, another 5-speed option, is ideal for heavier vehicles or those with higher horsepower․ Factors such as drivetrain type, engine power, and vehicle weight must be considered to ensure proper fitment; Additionally, crossmember modifications and driveshaft adjustments are often necessary to accommodate the new transmission․ Always verify compatibility with your vehicle’s make and model to avoid costly mismatches and ensure a seamless swap․
6․2 Crossmember and Driveshaft Modifications
When swapping the 4L60E for a manual transmission, the crossmember often needs modification to accommodate the new transmission’s length and mounting points․ The driveshaft may also require shortening to fit the updated configuration, ensuring proper alignment with the rear differential․ Accurate measurements are essential to avoid vibration or clearance issues․ In some cases, custom fabrication or adapter plates may be necessary to secure the transmission correctly․ Welding and alignment expertise are recommended for a professional finish․ These modifications ensure the transmission and driveshaft operate seamlessly, maintaining the vehicle’s performance and safety․ Proper adjustment and alignment are critical to prevent damage and ensure smooth operation․
6․3 Electronic Control Unit (ECU) and Wiring Considerations
When converting from the 4L60E automatic to a manual transmission, the Electronic Control Unit (ECU) and wiring system require significant modifications․ The 4L60E is electronically controlled, so swapping to a manual transmission necessitates reprogramming or replacing the ECU to eliminate automatic transmission dependencies․ A standalone transmission controller or a manual shift conversion kit can bypass the factory ECU, allowing full manual control․ Wiring harness modifications are often required to remove automatic-specific sensors and integrate manual components, such as a clutch position sensor․ Additionally, some systems may need a Transmission Control Module (TCM) bypass or custom wiring to function properly․ Properly addressing these electronic and wiring considerations ensures seamless communication between the engine, transmission, and driver, avoiding potential performance issues or system malfunctions․ Consulting a professional or using a specialized repair manual is highly recommended for this complex process․
6․4 Clutch and Flywheel Requirements
When converting from the 4L60E automatic to a manual transmission, selecting the right clutch and flywheel is critical for proper operation․ A heavy-duty clutch kit is often recommended to handle increased torque and ensure smooth engagement․ The flywheel must be compatible with the manual transmission and engine type, requiring precise alignment during installation․ In many cases, the existing flywheel may need to be replaced or resurfaced to ensure optimal performance․ Additionally, a pilot bearing is typically installed in the center of the crankshaft to support the manual transmission input shaft․ Proper installation and alignment of these components are essential to avoid vibration, noise, or premature wear․ Always consult a repair manual or a professional for specific torque specifications and compatibility recommendations to ensure a successful swap․ This step is vital for achieving reliable and smooth operation of the manual transmission system․

Step-by-Step Guide to the Swap
Begin by removing the 4L60E transmission, then install the manual transmission․ Connect the shifter, route the clutch cable, and test the setup to ensure proper operation․ Adjustments may be needed for smooth shifting and engagement․
7․1 Removing the 4L60E Transmission
Begin by draining the transmission fluid to avoid spills during removal․ Disconnect the electrical connectors and wiring harness from the 4L60E․ Remove the transmission cooler lines and any additional components attached to the transmission․ Use a transmission jack to support the unit securely․ Lower the crossmember or remove it to access the transmission bolts․ Carefully remove the bolts and slide the transmission out of the vehicle․ Ensure all connections are cleared before final removal․ If internal issues are encountered, consult a repair manual or seek professional assistance․ Proper removal sets the stage for a smooth manual transmission installation․
7․2 Installing the Manual Transmission
Position the manual transmission under the vehicle, ensuring it aligns with the engine and crossmember․ Reinstall the crossmember if modified or replaced․ Attach the driveshaft, verifying it’s properly shortened for the manual setup․ Connect the clutch and flywheel, ensuring they’re compatible with the new transmission․ Install the shifter inside the vehicle, routing the clutch cable carefully to avoid damage․ Address the ECU and wiring by integrating a standalone controller or reprogramming the existing system․ Secure all connections and test the transmission’s operation before finalizing the installation․ Proper alignment and secure fastening are crucial for smooth functionality and longevity․
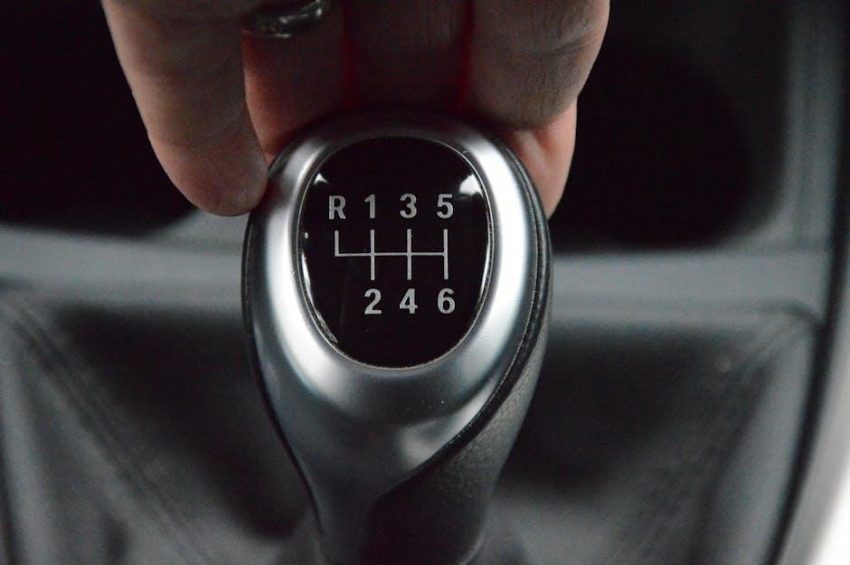
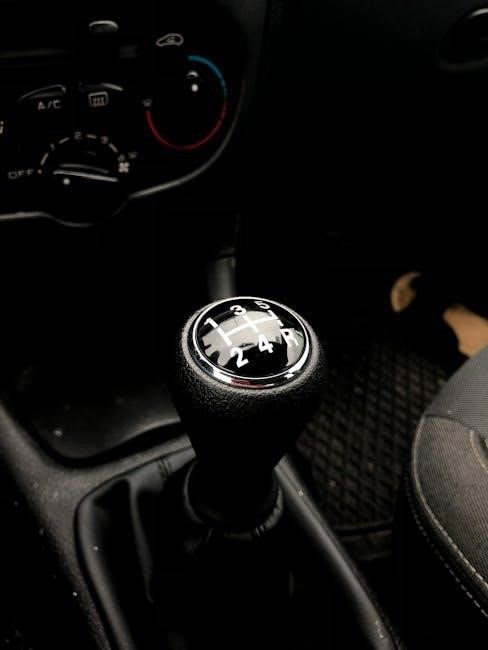
7․3 Connecting the Shifter and Controls
Once the manual transmission is installed, connect the shifter mechanism to the transmission’s top housing, ensuring it aligns correctly with the gear selector․ Route the clutch cable from the pedal assembly to the transmission, securing it with brackets to prevent interference or damage․ Connect the wiring harness to the transmission, focusing on the reverse light switch and neutral safety switch․ If using an electronic control unit (ECU), integrate a standalone controller to manage manual shifting․ Test the shifter and clutch operation to ensure smooth engagement and disengagement of gears․ Proper alignment and secure connections are critical for reliable performance and driver control․ Double-check all linkages and wiring before completing the installation․
7․4 Routing the Clutch Cable
Route the clutch cable from the pedal assembly to the transmission, ensuring it is securely fastened with cable ties or brackets to avoid interference․ Attach one end to the clutch pedal and the other to the transmission’s clutch fork or actuator․ Use protective sleeves or grommets when passing through the firewall to prevent damage․ Keep the cable away from hot or moving parts to avoid wear․ Adjust the cable length and tension as needed for smooth operation․ Double-check the routing and connections to ensure proper engagement and disengagement of the clutch, essential for reliable performance and to prevent damage to the transmission․ Proper routing and tension are crucial for optimal functionality․
7․5 Testing and Adjusting the Setup
After completing the installation, test the manual transmission setup thoroughly․ Start with a short drive in a controlled environment to ensure smooth gear shifts and proper clutch engagement․ Check for any unusual noises or vibrations, which may indicate misalignment or improper installation․ Adjust the clutch cable tension to prevent slippage or difficulty in shifting gears․ Verify that the shifter aligns correctly with the transmission’s gear positions to avoid grinding or missed shifts․ Test the setup under various driving conditions to ensure reliability․ If issues arise, such as hesitation or erratic shifting, inspect the connections and adjustments․ Consult a professional if persistent problems occur․ Proper testing and adjustment are critical for a seamless and durable manual transmission experience․

Common Issues and Troubleshooting
Common issues include wiring harness damage, clutch engagement problems, and driveshaft fitment․ Troubleshooting involves using a standalone controller, adjusting the clutch cable, and modifying crossmembers for proper alignment․
8․1 Overcoming Technical Challenges
When converting the 4L60E to a manual transmission, several technical challenges arise․ One common issue is the wiring harness, which may require reconfiguration or a standalone controller to bypass factory settings․ Additionally, the electronic control unit (ECU) must be recalibrated to recognize the manual transmission, preventing potential communication errors․ Another challenge involves the physical swap itself, such as shortening the driveshaft and modifying the crossmember to accommodate the new transmission․ Proper alignment and spacing are crucial to avoid vibrations and ensure smooth operation․ Lastly, the clutch system must be precisely adjusted to prevent slippage or failure․ Addressing these technical aspects with careful planning and precision ensures a successful swap․
8․2 Addressing Electronic and Mechanical Issues
During the 4L60E manual transmission swap, electronic and mechanical issues often arise․ Electronically, the ECU may fail to recognize the manual transmission, requiring a standalone controller or custom wiring harness․ Ensuring proper communication between the ECU and transmission is critical to avoid limp mode or incomplete shifts․ Mechanically, issues like driveshaft length, crossmember alignment, and clutch pedal setup must be addressed․ The driveshaft may need shortening to fit the new transmission, while the crossmember must be modified for proper clearance․ Additionally, the clutch system requires precise adjustment to prevent slippage or premature wear․ Troubleshooting these issues involves checking for error codes, verifying wiring connections, and ensuring all mechanical components are properly aligned and secured․ Proper tools and diagnostic equipment are essential for resolving these challenges efficiently․
Budgeting and Cost Considerations
Estimate costs between $3,800 and $4,500 for the swap, covering transmission, clutch, driveshaft, and labor․ Prices vary based on parts quality and installation complexity․
9․1 Estimated Costs for the Swap
The cost of swapping a 4L60E to a manual transmission can vary widely, but here are some estimated expenses to consider:
- Manual Transmission: A rebuilt or used manual transmission (e․g․, T-56 or NV3500) can cost between $1,200 and $2,000․
- Clutch and Flywheel: A clutch and flywheel kit typically ranges from $500 to $800․
- Driveshaft: Shortening or modifying the driveshaft can cost $300 to $500․
- Labor Costs: If hiring a professional, labor can add $1,000 to $1,500 to the total․
- Additional Parts: Crossmember modifications, ECU adjustments, and other components may add $500 to $1,000․
Total estimated cost for the swap can range from $3,800 to $4,500, depending on the specific parts and labor chosen․
Swapping the 4L60E automatic transmission to a manual setup is a rewarding project that enhances performance and driver engagement․ It requires careful planning, mechanical aptitude, and the right tools․ The process involves removing the automatic transmission, installing a compatible manual unit, and making necessary modifications․ Key considerations include compatibility, cost, and troubleshooting potential issues․ While the swap can be challenging, the end result offers improved control and satisfaction for driving enthusiasts․ Proper preparation and adherence to detailed steps ensure a successful conversion․ Ultimately, the 4L60E manual transmission swap is a feasible upgrade for those willing to invest time and effort into their vehicle’s performance and drivability․