

Power Pressure Cooker XL User Manual: A Comprehensive Guide
Welcome! This manual details the Power Pressure Cooker XL‚ offering guidance from initial setup through advanced features‚ ensuring safe and flavorful cooking experiences․
Understanding Your Power Pressure Cooker XL
The Power Pressure Cooker XL is a versatile kitchen appliance designed to simplify and accelerate your cooking process․ Utilizing pressure cooking technology‚ it significantly reduces cooking times while preserving essential nutrients and enhancing flavors․ This appliance isn’t just about speed; it’s about achieving consistently delicious results with minimal effort․

Unlike conventional cooking methods‚ the XL creates a sealed environment‚ trapping steam and increasing internal pressure; This elevated pressure raises the boiling point of water‚ allowing food to cook faster and more efficiently․ Understanding this core principle is key to mastering your Power Pressure Cooker XL and unlocking its full potential․ It’s a multi-functional tool‚ capable of sautéing‚ slow cooking‚ and steaming‚ offering a complete cooking solution․
Unboxing and Initial Setup
Carefully unpack your Power Pressure Cooker XL‚ ensuring all components are present․ These include the cooker base‚ inner pot‚ sealing ring‚ steam release valve‚ condensation collector‚ and potentially a steaming rack․ Inspect each part for any damage incurred during shipping․ Before first use‚ thoroughly wash the inner pot‚ lid‚ and any removable parts with warm‚ soapy water․
Place the cooker on a stable‚ heat-resistant surface away from flammable materials․ Ensure the steam release valve is properly seated․ Perform a ‘water test’ by adding 2 cups of water to the inner pot‚ closing the lid securely‚ and selecting a short cooking cycle․ This verifies proper sealing and functionality before cooking food․
Component Identification
The Power Pressure Cooker XL consists of several key components․ The Pressure Cooker Base houses the heating element and control panel․ The removable Inner Pot‚ typically stainless steel‚ holds the food during cooking․ A crucial element is the Sealing Ring & Steam Release Valve; the ring creates an airtight seal‚ while the valve regulates pressure․
The Condensation Collector catches excess moisture released during pressure cooking‚ preventing mess․ Familiarize yourself with the lid’s locking mechanism for safe operation․ Understanding each component’s function is vital for efficient and safe use of your appliance․ Refer to diagrams in this manual for visual identification of each part․
The Pressure Cooker Base
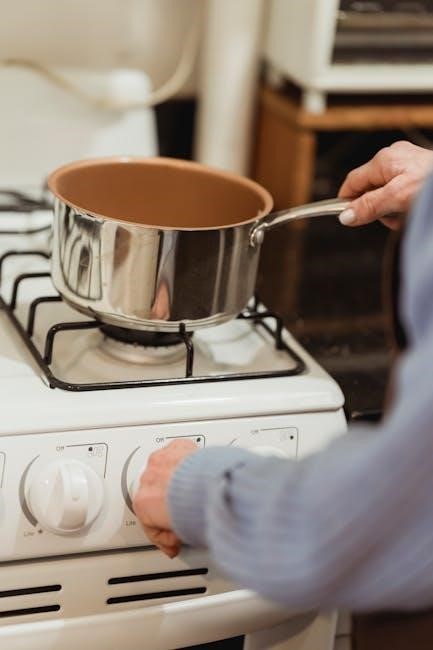
The base is the central housing for all operational components․ It contains the heating element‚ responsible for generating the heat needed for pressure cooking‚ sautéing‚ and slow cooking․ The control panel‚ located on the base‚ features buttons and a digital display for selecting cooking programs and adjusting settings․
Ensure the base is placed on a stable‚ heat-resistant surface before use․ Proper ventilation around the base is crucial for safe operation; Never immerse the base in water or any other liquid․ Regularly inspect the power cord for damage and avoid using if frayed․
The Inner Pot
The inner pot‚ typically made of stainless steel‚ is where food is placed for cooking․ It’s designed to withstand high pressure and temperatures․ Before each use‚ ensure the inner pot is clean and free of any debris․ Always add sufficient liquid when pressure cooking to prevent burning and ensure proper pressure build-up․
The inner pot should be correctly seated within the cooker base before locking the lid․ Avoid overfilling the pot – adhere to the maximum fill lines indicated․ After cooking‚ allow the pressure to release completely before opening the lid and removing the inner pot․ Handle with oven mitts as it will be hot!
The Sealing Ring & Steam Release Valve
The sealing ring‚ usually silicone‚ creates an airtight seal between the lid and the cooker base‚ essential for building pressure․ Inspect it before each use for cracks or damage; replace if necessary․ The steam release valve controls the release of pressure from the cooker․ It has settings for sealing (cooking) and venting (pressure release)․

Ensure the valve is in the correct position – sealing for pressure cooking‚ venting for quick release․ Never force the valve․ Regularly clean both the sealing ring and valve to prevent food buildup and maintain proper function․ A damaged sealing ring can prevent pressure build-up․
The Condensation Collector
The condensation collector is a small cup-shaped component‚ typically located on the rear of the Power Pressure Cooker XL․ Its primary function is to collect the moisture that accumulates during the pressure cooking process․ This prevents water from dripping onto your countertops and keeps your cooking area clean and dry․
Regularly check and empty the condensation collector after each use․ It’s easily removable for cleaning․ Ensure it’s properly positioned before starting a cooking cycle․ Ignoring the collector can lead to messy spills and potential slipping hazards․ Maintaining a clean collector contributes to the overall hygiene of your appliance․
Safety Precautions
Prioritize safety when operating your Power Pressure Cooker XL․ Always ensure the lid is securely locked before pressure cooking; never force it open․ Avoid overfilling the inner pot – adhere to the maximum fill lines for both liquids and solids․ Regularly inspect the sealing ring and steam release valve for damage or wear‚ replacing them as needed․
Never attempt to repair the cooker yourself․ Understand the different pressure release methods (natural and quick release) and use them appropriately․ Keep the cooker away from flammable materials and ensure adequate ventilation․ Ignoring these precautions could result in burns or appliance malfunction․
General Safety Guidelines
Read all instructions thoroughly before first use of your Power Pressure Cooker XL․ Never immerse the base unit in water or other liquids․ Always unplug the cooker when not in use and before cleaning․ Keep the power cord away from hot surfaces․
Do not operate the appliance if the cord or plug is damaged․ Supervise children closely when the cooker is in use․ Hot steam and contents can cause severe burns – exercise extreme caution during pressure release․ Use only accessories specifically designed for this model․ Failure to follow these guidelines may void your warranty and create a safety hazard․
Pressure Release Methods
Your Power Pressure Cooker XL offers three primary pressure release methods: Natural Pressure Release (NPR)‚ Quick Release (QR)‚ and Controlled Release․ NPR allows pressure to dissipate slowly – ideal for soups and stocks to prevent splattering․ QR involves carefully turning the steam release valve to vent steam rapidly‚ suitable for vegetables․
Controlled Release is a slower venting process than QR‚ useful for foods with higher liquid content․ Always direct steam away from yourself and cabinets․ Never force the valve open․ Understand each method’s implications for food texture and safety before use․ Incorrect release can affect cooking results and pose a burn risk․
Avoiding Common Mistakes
Several common errors can hinder optimal Power Pressure Cooker XL performance․ Overfilling the pot beyond the MAX line is a frequent issue‚ leading to blocked steam release․ Insufficient liquid can cause burning‚ so always meet minimum liquid requirements․ Forgetting the sealing ring prevents pressure build-up․
Incorrect valve positioning – ensuring it’s properly sealed or vented – is crucial․ Never attempt to open the lid while pressure remains․ Regularly inspect the sealing ring for cracks or damage․ Ignoring these details can compromise safety and cooking results․ Proper preparation and attention to detail are key to successful pressure cooking․
Operating Instructions
Getting Started: Ensure the inner pot is securely placed within the cooker base and the sealing ring is correctly positioned․ Add ingredients and liquid‚ adhering to recipe guidelines․ Close and lock the lid‚ verifying proper alignment․ Select your desired cooking program – pressure cook‚ sauté‚ or slow cook – using the control panel․
For pressure cooking‚ set the timer and allow the cooker to build pressure․ Once complete‚ choose a pressure release method (natural or quick)․ Always prioritize safety and follow the manual’s detailed instructions for each function․ Experiment with different settings to master your Power Pressure Cooker XL!
Basic Pressure Cooking

Essential Steps: Begin by adding ingredients and the appropriate amount of liquid to the inner pot – never exceed the maximum fill line! Securely lock the lid‚ ensuring the sealing ring is properly in place․ Select the ‘Pressure Cook’ function and choose a pre-set program (like ‘Meat/Stew’ or ‘Poultry’) or manually set the cooking time․
Allow the cooker to build pressure; this may take several minutes․ Once cooking is complete‚ the cooker will maintain pressure․ Choose between natural pressure release (allowing pressure to dissipate slowly) or quick release (carefully venting steam)․ Always exercise caution during steam release to avoid burns․

Sautéing and Browning
Building Flavor: The ‘Sauté’ function allows for browning meats and vegetables directly in the inner pot before pressure cooking‚ enhancing the dish’s depth of flavor․ Press the ‘Sauté’ button and select your desired heat level – Low‚ Medium‚ or High․ Add oil‚ then your ingredients‚ and cook‚ stirring frequently‚ until browned to your liking․
Remember to deglaze the pot after browning by adding liquid and scraping up any browned bits from the bottom․ This prevents the ‘Burn’ error during pressure cooking․ Once sautéing is complete‚ transition seamlessly to pressure cooking without removing the ingredients․
Slow Cooking Functionality
Low and Slow: The Power Pressure Cooker XL offers a ‘Slow Cook’ function‚ providing tender‚ flavorful results similar to traditional slow cookers․ Select ‘Slow Cook’ and choose your desired time – Low or High․ Low is ideal for 6-8 hours of cooking‚ while High is suitable for 3-4 hours․
This function is perfect for soups‚ stews‚ and tougher cuts of meat․ Ensure sufficient liquid is present to prevent sticking․ Unlike pressure cooking‚ the lid can be slightly ajar during slow cooking‚ though it’s more efficient to keep it sealed for consistent temperature․
Steaming with the XL
Healthy & Quick: The Power Pressure Cooker XL excels at steaming‚ preserving nutrients and flavors․ Place the included steaming rack inside the inner pot‚ adding 1-2 cups of water․ Ensure the water level is below the rack․ Arrange vegetables‚ fish‚ or poultry on the rack‚ avoiding overcrowding․
Secure the lid and set the valve to ‘Sealing’․ Select the ‘Steam’ function and set the timer according to the food type․ Delicate vegetables require less time than root vegetables or proteins․ Steaming is a fantastic‚ healthy cooking method‚ delivering moist and flavorful results quickly․
Cooking Times & Recipes
Unlock Culinary Potential: This section provides essential cooking times for various foods‚ enabling consistent and delicious results․ Remember‚ these are guidelines; adjust based on your preferences and ingredient size․ Poultry and tougher cuts of meat benefit from longer cooking times‚ typically 20-50 minutes under pressure․
Vegetables and beans cook much faster‚ often within 5-15 minutes․ Explore included recipes like hearty chili‚ comforting stew‚ and flavorful soup to inspire your culinary journey․ Experiment with seasonings and ingredients to personalize each dish․ Consistent practice will refine your pressure cooking skills!
Poultry & Meat Cooking Times
Achieving Tender Perfection: For whole chickens (3-4 lbs)‚ pressure cook for approximately 25-30 minutes‚ followed by a 15-minute natural pressure release․ Bone-in chicken thighs require 15-20 minutes‚ while breasts need 10-12 minutes․ Tougher cuts like beef chuck roast benefit from 45-60 minutes of pressure cooking‚ ensuring fall-apart tenderness․
Lamb shanks take around 40-45 minutes․ Remember to always account for the time it takes for the cooker to reach pressure and the subsequent release․ Adjust times slightly based on the size and thickness of the meat․ Always verify internal temperature for safety!
Vegetable & Bean Cooking Times
Vibrant & Perfectly Cooked: Root vegetables like potatoes and carrots require approximately 8-12 minutes of pressure cooking‚ yielding a tender yet firm texture․ Broccoli‚ asparagus‚ and green beans need just 3-5 minutes to retain their vibrant color and crispness․ Dried beans‚ such as chickpeas and kidney beans‚ benefit from 25-30 minutes‚ eliminating the need for overnight soaking․
Lentils cook remarkably fast – around 8-10 minutes․ For softer vegetables like tomatoes‚ a shorter cooking time of 5-7 minutes is ideal․ Remember to adjust times based on desired tenderness and quantity․
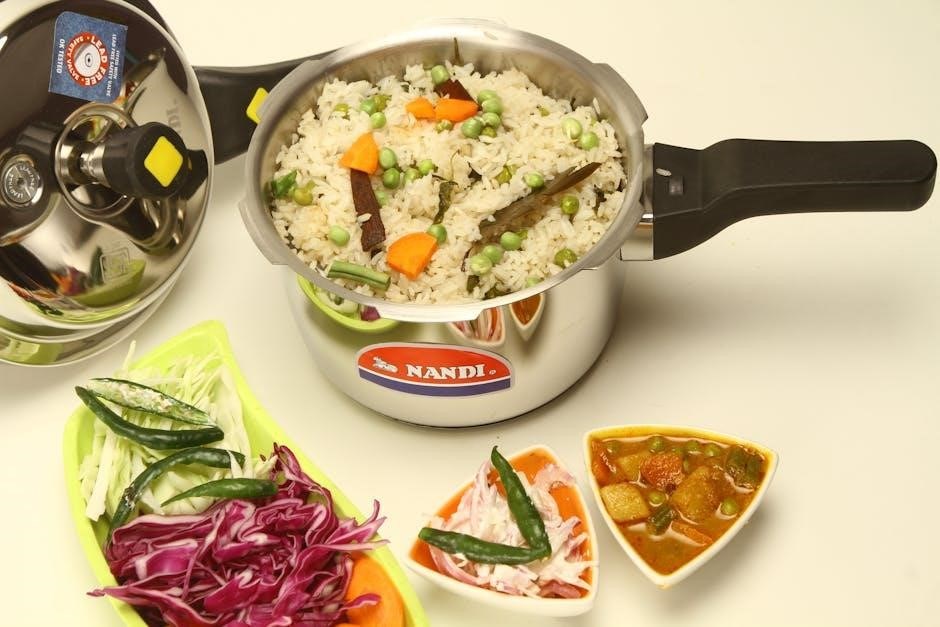
Sample Recipes: Chili‚ Stew‚ and Soup
Flavorful One-Pot Meals: For a hearty chili‚ sauté ground beef‚ onions‚ and peppers‚ then pressure cook with beans‚ tomatoes‚ and spices for 15-20 minutes․ Beef stew benefits from browning the meat‚ followed by pressure cooking with vegetables and broth for 30-35 minutes․ Creamy tomato soup is achievable by sautéing aromatics‚ adding tomatoes and broth‚ and pressure cooking for 8-10 minutes‚ then blending․

These recipes demonstrate the XL’s versatility․ Adjust seasoning to your preference․ Always remember to follow safety guidelines for pressure release․ Enjoy quick‚ delicious‚ and convenient meals!
Cleaning and Maintenance
Maintaining Peak Performance: Regular cleaning ensures longevity and food safety․ Always unplug the cooker before disassembly․ The inner pot and lid are dishwasher safe‚ but hand washing preserves their finish․ Carefully inspect the sealing ring for cracks or damage; replace as needed․ The condensation collector should be emptied and cleaned after each use to prevent buildup․
Avoid abrasive cleaners․ Thoroughly dry all components before reassembly․ Proper storage‚ away from direct sunlight and moisture‚ will extend the life of your Power Pressure Cooker XL․ Consistent care guarantees delicious meals for years to come!
Disassembling for Cleaning
Safe & Thorough Disassembly: Begin by ensuring the cooker is cool and unplugged․ Release any remaining pressure․ Gently lift the lid‚ then press the lid release button to remove it․ The sealing ring can then be lifted from the lid’s rim․ Carefully remove the inner pot․ The steam release valve and float valve are typically removable for individual cleaning – consult diagrams in the full manual․
Inspect each component for food residue․ Avoid forcing parts; gentle manipulation prevents damage․ Remember the order of disassembly for easy reassembly․ Proper disassembly allows for a comprehensive and hygienic cleaning process․
Cleaning the Inner Pot & Lid
Inner Pot Care: The stainless steel inner pot is dishwasher safe‚ or can be washed by hand with warm‚ soapy water․ For stubborn food residue‚ a paste of baking soda and water can be effective․ Avoid abrasive cleaners that may scratch the surface․ Rinse thoroughly and dry completely․
Lid Cleaning: The lid can also be hand-washed or placed in the dishwasher․ Pay close attention to the sealing ring and steam release valve‚ ensuring they are free of debris․ Inspect the vent and valves for blockages․ Dry all components completely before reassembling to prevent mildew or odors․
Storing Your Power Pressure Cooker XL
Proper Storage: Before storing‚ ensure the Power Pressure Cooker XL is completely cool‚ clean‚ and dry․ Store the unit in a cool‚ dry place‚ away from direct sunlight and moisture․ Avoid stacking heavy items on top‚ which could damage the cooker․
Component Storage: The inner pot can be stored inside the cooker‚ or separately․ Ensure the sealing ring is clean and dry before storing; consider storing it separately to prevent odor absorption․ Keep the steam release valve readily accessible for easy use․ Proper storage extends the lifespan of your appliance․
Troubleshooting Common Issues
Addressing Problems: This section helps resolve typical Power Pressure Cooker XL issues․ If pressure doesn’t build‚ check the sealing ring and lid alignment․ Food burning? Reduce cooking time or add more liquid․ Steam release problems often stem from a blocked valve – ensure it’s clear․
Error Codes: Consult the manual for specific error code meanings․ Common issues include insufficient liquid or a faulty sensor․ Never attempt to open the lid forcibly while pressure remains․ If problems persist‚ contact customer support for assistance․ Safe operation is paramount; do not ignore warning signs․
Pressure Not Building
Identifying the Cause: If your Power Pressure Cooker XL isn’t pressurizing‚ several factors could be at play․ First‚ verify the lid is securely locked; it must click into place․ Inspect the sealing ring for cracks‚ damage‚ or improper seating – a faulty ring prevents a tight seal․ Ensure sufficient liquid is present‚ as adequate moisture is crucial for pressure development․
Troubleshooting Steps: Check the steam release valve position; it should be set to ‘Sealing’․ Confirm the pressure regulator isn’t clogged․ A blocked valve inhibits pressure build-up․ If issues persist‚ try reseating the lid and repeating the process․
Food Burning
Understanding the Issue: Food burning in your Power Pressure Cooker XL typically stems from insufficient liquid‚ excessively high heat‚ or prolonged cooking times․ Certain foods‚ like dairy-based sauces or starches‚ are more prone to sticking and scorching․ Improper deglazing after sautéing can also contribute to burnt residue․
Preventative Measures & Solutions: Always ensure adequate liquid levels are met for the recipe․ Utilize the ‘Sauté’ function cautiously‚ frequently stirring to prevent sticking․ Deglaze the pot thoroughly after browning to release stuck-on bits․ Reduce cooking times slightly and consider using the ‘Low’ pressure setting for delicate foods․
Steam Release Problems
Identifying the Issue: Difficulty releasing steam can occur due to a blocked steam release valve‚ a faulty sealing ring‚ or excessive pressure buildup․ A clogged valve prevents safe pressure reduction‚ while a damaged sealing ring compromises the cooker’s ability to maintain or release pressure effectively․ Food particles obstructing the valve are a common cause․
Troubleshooting Steps: First‚ ensure the steam release valve is clean and unobstructed․ Inspect the sealing ring for cracks or damage‚ replacing it if necessary․ Never force the valve open; allow natural pressure release if quick release is problematic․ If issues persist‚ discontinue use and consult customer support․
Error Codes and Their Meanings
Understanding Error Signals: The Power Pressure Cooker XL utilizes error codes to indicate specific malfunctions‚ ensuring user safety and facilitating troubleshooting․ These codes appear on the display panel‚ prompting immediate attention to prevent potential damage or injury․ Ignoring error codes can compromise cooking results and cooker functionality․
Common Codes & Resolutions: “E1” often signifies a pressure sensor issue‚ requiring a service check․ “E2” indicates overheating‚ necessitating a cool-down period and inspection of ventilation․ “E3” suggests a lid sealing problem; verify proper closure․ Consult the full error code list in the appendix for comprehensive guidance and contact support if unresolved․
Advanced Features & Tips
Unlock Full Potential: The Power Pressure Cooker XL boasts features beyond basic operation․ Utilize the ‘Delay Start’ function for convenient meal preparation‚ scheduling cooking to align with your schedule․ Explore ‘Custom Cooking Programs’ to fine-tune settings for specific recipes‚ optimizing texture and flavor profiles․
Flavor & Texture Maximization: For richer tastes‚ brown meats before pressure cooking․ Deglaze the pot with broth or wine to capture flavorful fond․ Experiment with spice blends and herbs․ Proper liquid ratios are crucial; consult recipes for optimal results․ Remember‚ understanding your cooker unlocks culinary creativity!
Using the Delay Start Function
Convenient Meal Planning: The Delay Start feature allows you to pre-program your Power Pressure Cooker XL to begin cooking at a later time․ This is ideal for busy schedules‚ ensuring a hot meal awaits your return․ First‚ prepare all ingredients and add them to the inner pot․ Then‚ select the desired cooking program and pressure level․
Setting the Delay: Use the ‘Delay Start’ button to set the desired delay time‚ in hours․ The cooker will automatically begin the cooking cycle at the programmed time․ Important: Do not use this function with recipes containing perishable ingredients for extended delays‚ to maintain food safety․
Customizing Cooking Programs
Tailored Cooking: While the Power Pressure Cooker XL offers pre-set programs‚ you can customize them to perfectly suit your recipes․ Adjust cooking time and pressure levels to achieve desired results for various dishes․ To modify a program‚ select it‚ then use the ‘Time’ and ‘Pressure’ buttons to increase or decrease the settings․
Experimentation is Key: Start with small adjustments and document your changes for future reference․ Remember that cooking times may vary based on ingredient quantity and initial temperature․ Pro Tip: For thicker sauces or more tender meats‚ slightly increase cooking time and pressure․
Maximizing Flavor & Texture
Layering Flavors: To elevate your dishes‚ consider layering flavors․ Sauté aromatics like onions‚ garlic‚ and ginger directly in the inner pot before pressure cooking․ This builds a flavorful base․ Browning Meats: Searing meats before pressure cooking adds depth and richness․ Utilize the ‘Sauté’ function for optimal results․
Deglazing the Pot: After browning‚ deglaze the pot with broth or wine to loosen browned bits‚ incorporating them into your sauce․ Natural vs․ Quick Release: For soups and stews‚ natural pressure release often yields more tender results and richer flavors․ Experiment to find what works best!