
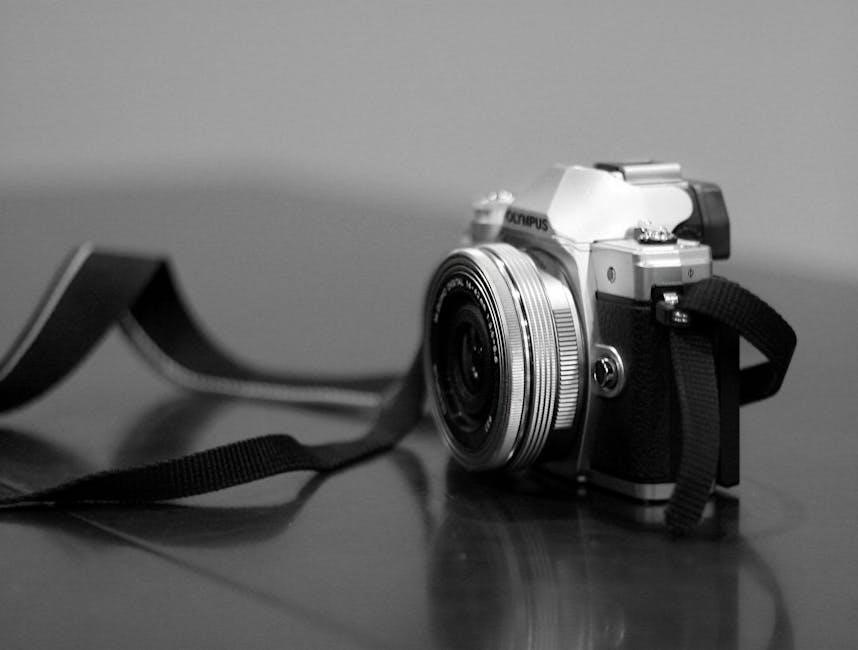
The Olympus OM-1 is a legendary 35mm film SLR camera, renowned for its compact design, durability, and versatility, making it a favorite among photography enthusiasts and professionals alike.
1.1. Overview of the Olympus OM-1 Camera
The Olympus OM-1 is a 35mm single-lens reflex (SLR) camera celebrated for its compact size, robust build, and intuitive design. Introduced in 1973, it revolutionized photography by combining professional-grade features with portability. Its mechanical precision, weather-sealed body, and compatibility with the extensive OM lens system make it a versatile tool for various photographic genres, from portraits to street photography. The OM-1’s enduring popularity stems from its reliability, ergonomic controls, and adaptability, solidifying its status as a timeless classic in the world of film photography.
1.2. Brief History and Development of the OM-1
The Olympus OM-1 was first introduced in 1973, marking a significant milestone in Olympus’ camera development. Designed by Yoshihisa Maitani, it was the first in the OM series, aiming to create a compact, lightweight, and professional-grade SLR. The OM-1 quickly gained acclaim for its durable construction, precise mechanics, and innovative features. Its release revolutionized the photography industry, offering a portable yet powerful tool for professionals and enthusiasts alike. The OM-1’s success laid the foundation for the OM system, which grew to include over 280 accessories, cementing its legacy as a landmark camera in photographic history.
1.3. Key Features and Innovations of the OM-1
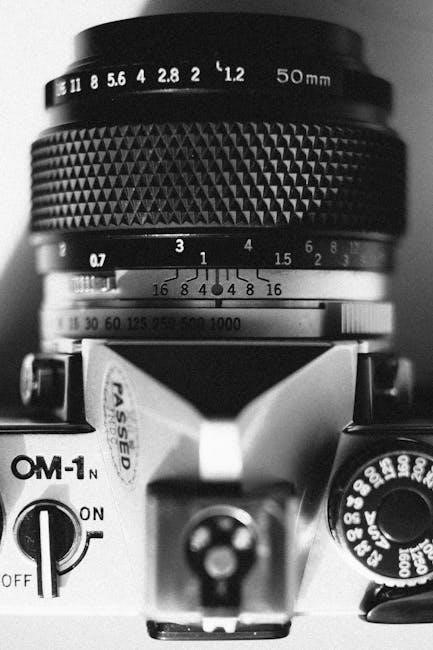
The Olympus OM-1 introduced several groundbreaking features, including a compact and lightweight design that set it apart from bulkier SLRs. It featured a titanium focal-plane shutter, capable of speeds up to 1/1000th of a second, and a precise, mechanically controlled system. The OM-1 also boasted a full-aperture metering system, ensuring accurate exposures. Its modular design allowed for easy lens interchange and accessory mounting. Additionally, it included features like a self-timer and mirror lock-up, enhancing control for photographers. These innovations made the OM-1 a versatile and professional-grade tool, appealing to both enthusiasts and experts.
Getting Started with the Olympus OM-1
Unpacking and setting up the Olympus OM-1 involves familiarizing yourself with its controls, loading film, setting the ASA, and installing batteries to ensure optimal performance.
2.1. Unpacking and Initial Setup
When unpacking your Olympus OM-1, ensure all components are included and inspect for any damage. Start by reading the manual to understand the camera’s layout and functions. Familiarize yourself with the controls, such as the shutter speed dial, aperture ring, and film advance lever. Before use, check the battery compartment and ensure the mirror and viewfinder are clean. This initial setup is crucial for a smooth shooting experience. Proper preparation ensures your OM-1 is ready to capture high-quality images with precision and reliability.
2.2. Understanding the Camera Layout and Controls
The Olympus OM-1 features a intuitive and ergonomic design, with controls strategically placed for easy access. The top plate includes the shutter speed dial, film advance lever, and ASA/Film Speed dial. The front houses the lens release button and focus ring, while the back includes the viewfinder and LCD for reviewing settings. The mode dial and exposure compensation button are also conveniently located. Familiarizing yourself with these controls ensures seamless operation and allows you to focus on capturing your best shots. Proper understanding of the layout enhances your photography experience.
2.3. Loading Film into the OM-1
The Olympus OM-1 uses 35mm perforated film in 12, 20, or 36 exposure cartridges. To load film, ensure the ISO is set correctly. Open the camera back by pulling the release latch. Insert the film cartridge into the chamber, aligning it with the guide. Gently pull the film leader to the take-up spool and advance the film by turning the film advance lever twice. Close the back and check the frame counter to confirm loading. This process ensures your camera is ready for shooting with properly loaded film. Proper loading is essential for optimal performance.
2.4. Setting the ASA/Film Speed
To set the ASA or film speed on the Olympus OM-1, locate the ASA dial on the top of the camera. Rotate the dial to match the film speed of the loaded cartridge, ensuring accurate exposure settings. This step is crucial for proper film sensitivity and image quality. Once set, the camera will automatically adjust aperture and shutter speed based on the selected ASA value. Always confirm the ASA setting matches the film cartridge for optimal results. This ensures precise exposure control and enhances your photography experience.
2.5. Battery Installation and Power Management
Proper battery installation and power management are essential for the Olympus OM-1. Use SR44 or LR44 batteries, inserting them into the battery compartment located on the bottom of the camera. Ensure the batteries are correctly oriented for proper function. To conserve power, turn off the camera when not in use. The OM-1 features a battery life indicator in the viewfinder, alerting you when power is low. Regularly check battery life, especially before extended shoots, to avoid interruptions. Proper management ensures optimal performance and extends the camera’s operational efficiency.
Shooting Modes and Techniques
The Olympus OM-1 offers various shooting modes, including Aperture Priority and Manual, allowing photographers to explore creative techniques with precision and control, capturing life’s fleeting moments with enhanced imaging capabilities.
3.1. Aperture Priority Mode
The Olympus OM-1’s Aperture Priority Mode allows photographers to manually set the aperture, with the camera automatically adjusting the shutter speed for optimal exposure. This mode is ideal for controlling depth of field, enabling creative freedom in various lighting conditions. The OM-1’s metering system ensures accurate exposures, making it a versatile choice for both professionals and enthusiasts. Photographers can focus on composition and artistic expression while the camera handles the technical aspects of exposure, making it a powerful tool for capturing stunning images with precision and ease.
3.2. Manual Mode and Exposure Control
Manual Mode on the Olympus OM-1 grants photographers full control over both aperture and shutter speed, allowing for precise adjustments to achieve desired creative effects. This mode is particularly useful in challenging lighting conditions where automatic settings may not capture the intended result. The OM-1’s metering system provides accurate exposure readings, enabling photographers to make informed adjustments. While it requires a deeper understanding of exposure principles, Manual Mode offers unparalleled creative freedom and control, making it a favorite among experienced photographers who value precision and artistic expression.
3.3. Using the Self-Timer and Mirror Lock-Up
The Olympus OM-1 features a self-timer that delays the shutter release by 10-12 seconds, minimizing camera shake and allowing photographers to be included in group shots. Activating the self-timer is straightforward, ensuring sharp images even when shooting unassisted. Additionally, the mirror lock-up function reduces vibrations caused by the mirror movement, which is especially useful for macro, astrophotography, or low-light photography. By combining these features, photographers can achieve greater precision and clarity in their images, making the OM-1 a versatile tool for professional-grade photography.
3.4. Bracketing and Multiple Exposures
The Olympus OM-1 allows for precise control over exposure with its bracketing feature, enabling photographers to capture a series of images at varying exposures to ensure optimal results. This is particularly useful for high-contrast scenes. Multiple exposures can also be achieved by not advancing the film, offering creative possibilities for overlapping images. These features enhance flexibility, allowing photographers to experiment with dynamic range and artistic effects, making the OM-1 a powerful tool for both technical and creative photography.
Focusing and Metering
The Olympus OM-1 offers precise manual focusing and responsive controls, ensuring sharp images. Its advanced metering system provides accurate exposure readings, enhancing photography outcomes.
4.1. Autofocus Modes and Performance
The Olympus OM-1 does not feature autofocus, as it is a manual-focus film SLR camera. Instead, it relies on precise manual focusing controls, ensuring photographers have full creative control. The camera’s viewfinder provides a clear, bright display with a microprism spot for accurate focus confirmation. This design emphasizes precision and deliberate shooting, making it a favorite for photographers who value tactile control and manual craftsmanship. The OM-1’s focusing system is celebrated for its simplicity and effectiveness, allowing for sharp, well-composed images with minimal effort.
4.2. Manual Focusing Techniques
The Olympus OM-1 relies on manual focusing, offering a precise and tactile experience. Use the lens focusing ring to adjust sharpness, guided by the viewfinder’s clear display. The microprism spot in the center of the viewfinder aids in achieving sharp focus quickly. For added accuracy, use the split-image prism, which aligns when the subject is sharp. Zoom in on high-contrast areas for precise focusing. Always ensure steady hands or use a tripod for optimal results, especially in low-light conditions. Mastering manual focus enhances control over your photography.
4.3. Understanding the Metering System
The Olympus OM-1 features a center-weighted metering system, providing accurate exposure readings. It measures light through the lens, ensuring precise calculations based on the selected aperture and shutter speed. The system is sensitive to light levels, making it effective in various lighting conditions. For optimal results, ensure the ASA/Film Speed is set correctly. Use the built-in meter to adjust settings manually, and consider bracketing shots for challenging lighting scenarios. The metering system is intuitive, allowing photographers to achieve well-balanced exposures effortlessly. Regular use enhances familiarity with its behavior.
4.4. Using the Viewfinder and LCD
The Olympus OM-1’s viewfinder is bright and clear, offering 100% frame coverage for precise composition. It features a diopter adjustment to accommodate different vision needs. The LCD on the back displays essential shooting information, including aperture, shutter speed, and battery level. Use the viewfinder for accurate framing and focus, while the LCD provides quick access to settings and exposure data. This combination enhances shooting efficiency and ensures optimal control over your photography workflow. Regular use will familiarize you with its intuitive design and functionality.
Exposure and Image Quality
The Olympus OM-1 offers advanced exposure control, featuring aperture priority and manual modes. Its precise metering system ensures accurate exposures, while bracketing allows for capturing a range of lighting conditions.
5.1. Adjusting ISO and Film Speed
The Olympus OM-1 allows precise control over ISO and film speed settings, ensuring optimal image quality in various lighting conditions. Located on top of the camera, the ASA/Film Speed dial enables easy adjustments. Users can set film speeds between ISO 25 to 3200, depending on the film type and lighting. It is crucial to match the film speed with the loaded film to achieve accurate exposures. Experimenting with different speeds can enhance creativity, but proper calibration is essential for consistent results. Always refer to the manual for detailed guidance on film speed adjustments.
5.2. White Balance and Color Accuracy
The Olympus OM-1 enables precise control over white balance and color accuracy through its film-based system. While digital white balance adjustments aren’t applicable, the camera’s design allows for accurate color reproduction by selecting the appropriate film stock. Use specific film types, such as daylight or tungsten-balanced, to match lighting conditions. Additionally, color filters can enhance or correct tones, ensuring vibrant and true-to-life results. Proper handling and storage of film are essential to maintain color integrity and achieve optimal outcomes in your photography.
5.3. Exposure Compensation and Bracketing
The Olympus OM-1 allows for precise exposure control through manual adjustments. Use the ASA/Film Speed dial to compensate for lighting conditions, ensuring optimal exposure. Bracketing can be achieved by manually adjusting the aperture or shutter speed between shots, capturing a range of exposures. This technique is ideal for high-contrast scenes. Review your results to select the best exposure or combine multiple shots for HDR-like effects. Experiment with different bracketing intervals to refine your technique and achieve desired outcomes. This hands-on approach enhances creative control over your film photography.
5.4. Noise Reduction and Image Optimization
The Olympus OM-1 excels in delivering crisp, high-quality images. To minimize film grain and optimize results, use lower ISO settings and ensure proper exposure. Sharpness is enhanced by the camera’s precise focusing system and high-quality lenses. For digital scans, noise reduction tools can refine grain structure. Proper film development and scanning techniques further enhance image clarity. Experiment with different films to find the balance between grain and detail that suits your artistic vision. Regular maintenance of the camera ensures optimal performance and image quality across all shooting conditions.
Flash and External Lighting
The Olympus OM-1 features a built-in flash with TTL metering for precise illumination. External flash units and sync modes enhance lighting control, ensuring balanced exposures.
6.1. Built-in Flash and TTL Metering
The Olympus OM-1 features a built-in flash with TTL (Through-The-Lens) metering, ensuring precise and automatic flash intensity adjustment. This system measures light passing through the lens, optimizing exposure accuracy and reducing overexposure. The built-in flash is ideal for casual and indoor photography, offering a convenient solution for adding light to scenes. TTL metering enhances color accuracy and natural-looking results, making it a reliable tool for photographers seeking professional-quality images with minimal effort. This feature is particularly useful for capturing balanced exposures in challenging lighting conditions.
6.2. Using External Flash Units
The Olympus OM-1 supports external flash units, offering greater flexibility and power for advanced lighting setups. These flashes can be connected via the camera’s hot shoe or PC sync socket, ensuring compatibility with a wide range of accessories. External flashes provide additional illumination for challenging lighting conditions, such as high-contrast scenes or large group portraits. The OM-1’s TTL metering system works seamlessly with compatible external flashes, ensuring precise exposure control. For optimal results, users can adjust flash intensity manually or utilize the camera’s built-in flash metering for balanced lighting.
6.3. Sync Modes and Wireless Flash
The Olympus OM-1 supports various sync modes to suit different photography needs. First curtain sync is ideal for capturing sharp images with natural motion blur, while second curtain sync creates artistic effects by freezing motion at the end of exposure. Wireless flash functionality enables off-camera lighting, enhancing creativity and flexibility. Use the camera’s TTL metering system for precise exposure control. Ensure compatible flashes are properly connected and configured for optimal performance. Experiment with sync modes and wireless setups to achieve dynamic lighting effects in your photography.
6.4. Balancing Ambient and Flash Lighting
Balancing ambient and flash lighting is crucial for achieving natural-looking results. The Olympus OM-1 allows precise control over flash intensity to blend seamlessly with ambient light. Use the camera’s TTL metering system to ensure balanced exposure. Experiment with flash compensation settings to adjust the power output relative to the ambient light. For a more subtle effect, reduce flash intensity to let ambient light dominate. This technique is ideal for portraits, where natural illumination enhances the subject while the flash fills in shadows. Proper balance creates images with depth and a professional aesthetic.
Lenses and Accessories
The Olympus OM-1 supports an extensive range of interchangeable lenses, including prime, zoom, and specialty optics. Accessories like filters, tripods, and remote shutters enhance functionality and creativity.
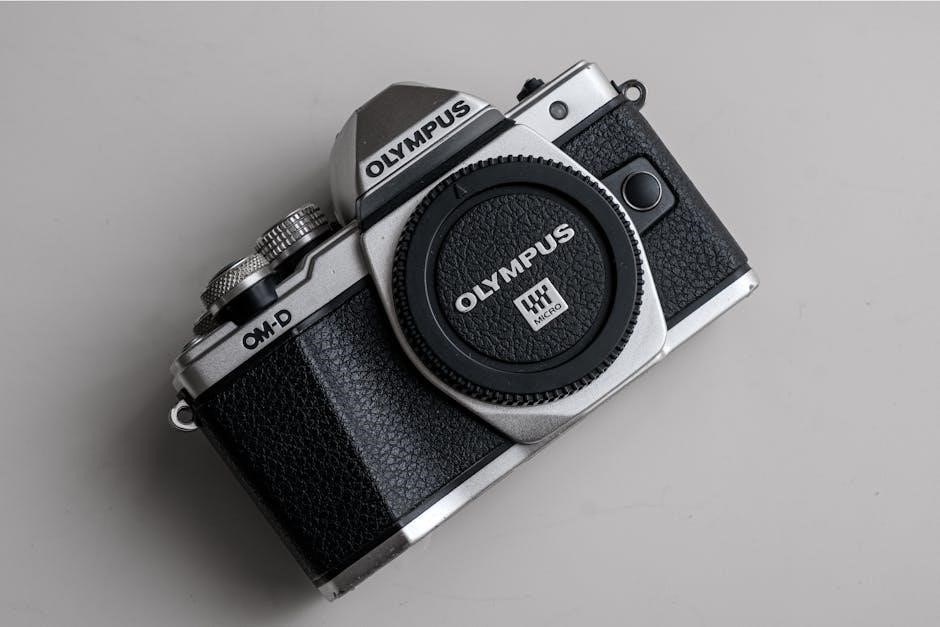
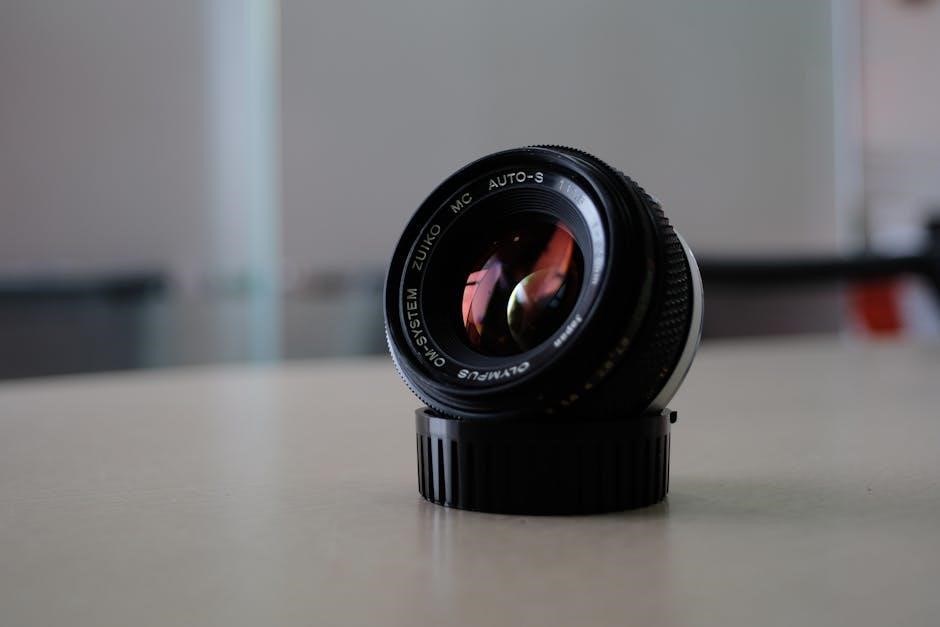
7.1. Olympus OM Lens Compatibility
The Olympus OM-1 is compatible with the extensive OM lens system, offering a wide range of interchangeable lenses. From standard 50mm primes to wide-angle and telephoto lenses, the OM system provides exceptional optical quality. Macro and specialty lenses further expand creative possibilities. The OM mount ensures mechanical and optical consistency across all lenses. While designed for film, the OM-1’s legacy allows compatibility with adaptors for modern digital systems. This versatility makes the OM-1 a timeless choice for photographers seeking precision and adaptability.
7.2. Prime vs. Zoom Lenses
Prime lenses offer superior optical quality and larger apertures, making them ideal for low-light conditions and shallow depth of field. They are compact, lightweight, and deliver sharpness across the frame. Zoom lenses provide versatility with variable focal lengths, allowing quick composition adjustments without lens changes. While zooms are convenient, primes often excel in image quality and portability. The OM-1 supports both, catering to photographers’ preferences and shooting styles. Prime lenses are perfect for portraits and street photography, while zooms are better for events or travel, where flexibility is key.
7.3. Using Filters and Lens Attachments
Filters and lens attachments enhance the Olympus OM-1’s functionality, allowing photographers to achieve specific effects or improve image quality. UV filters protect the lens from dust and scratches, while polarizing filters reduce glare and enhance colors. Neutral density filters control light intake for better exposure in bright conditions. Lens attachments like teleconverters extend focal length, and macro adapters enable close-up photography. These accessories expand creative possibilities without compromising the OM-1’s optical excellence, ensuring versatility for various shooting scenarios and artistic goals. Properly using them can elevate your photography to new levels.
7.4. Tripods and Remote Shutter Release
Using a tripod with the Olympus OM-1 ensures camera stability, minimizing vibrations and camera shake, especially in low-light conditions or with slower shutter speeds. The tripod socket on the OM-1 allows for secure mounting. A remote shutter release or the camera’s self-timer can further reduce movement during exposure, ensuring sharper images. These accessories are essential for landscape, astrophotography, and macro photography, where precision and stability are critical. They help photographers achieve professional results by eliminating human error and allowing for precise control over the shooting process.
Maintenance and Troubleshooting
Regular maintenance ensures the Olympus OM-1 performs optimally. Clean the camera and lenses meticulously, store equipment properly, and address common issues promptly to extend its lifespan.
8.1. Cleaning the Camera and Lenses
Proper cleaning is essential to maintain the Olympus OM-1’s performance. Use a soft, dry cloth to wipe the camera body and external surfaces. For the lenses, employ a microfiber cloth and a lens cleaning solution; Avoid harsh chemicals or abrasive materials that could damage coatings. Gently remove smudges or fingerprints, working in circular motions to prevent scratches. For stubborn spots, dampen the cloth slightly but ensure no moisture seeps into the camera. Regular cleaning prevents dust and smudges from affecting image quality and ensures optimal functionality over time.
8.2. Storing the Camera and Accessories
Store the Olympus OM-1 in a cool, dry place to prevent moisture damage. Use the original case or a protective bag to safeguard the camera and lenses. Keep the camera and accessories away from direct sunlight and extreme temperatures. Silica gel packets can help maintain humidity control. Store lenses separately to avoid scratching, and ensure all components are clean before storage. Organize accessories like filters and straps neatly to prevent misplacement. Regularly check stored items for dust or moisture to maintain their condition and ensure optimal performance when in use.
8.3. Common Issues and Solutions
Common issues with the Olympus OM-1 include inaccurate metering, jammed shutters, and fogging on lenses. For metering inaccuracies, calibrate the light meter or use an external meter. If the shutter jams, gently clean the mechanism with a soft brush or consult a professional. To prevent fogging, store the camera in a dry environment and use silica gel packets. Regular cleaning of lenses and camera components can prevent dust buildup. For persistent issues, refer to the manual or seek assistance from authorized service centers to ensure optimal performance and longevity of the camera.
8.4. Firmware Updates and Maintenance
Regular firmware updates are essential to ensure the Olympus OM-1 operates at peak performance. Check the official Olympus website for the latest firmware versions and follow the provided instructions to install updates. For maintenance, clean the sensor and lenses regularly to prevent dust buildup. Use a soft brush and microfiber cloths to avoid scratching sensitive components. Additionally, ensure batteries are fresh and connections are clean. Periodically update camera software for compatibility with new lenses or accessories. Always refer to the manual or contact Olympus support for assistance with firmware installation or maintenance procedures.
Advanced Techniques
The Olympus OM-1 excels in advanced photography, offering capabilities like astrophotography, macro, sports, and portrait photography. Use long exposures, focus stacking, and creative Bracketing for stunning results.
9.1. Astrophotography with the OM-1
The Olympus OM-1 is well-suited for astrophotography, offering manual control and long exposures. Use the bulb mode for star trails and deep-space objects. Employ a remote shutter release or the self-timer to minimize vibrations. Focus manually at infinity for sharp celestial images. A wide-aperture lens is ideal for capturing more light. Experiment with ISO settings and exposure times to balance detail and noise. For multi-shot compositions, use the multiple exposure feature. Ensure stability with a sturdy tripod and consider using a cable release or interval shooter for consistent results.
9.2. Macro and Close-Up Photography
The Olympus OM-1 excels in macro and close-up photography, allowing precise control over focus and composition. Use extension tubes or bellows for extreme magnification. Manual focus is ideal for fine-tuning sharpness. A sturdy tripod ensures stability for sharp images. Natural light enhances detail, while ring flashes can add even illumination. Experiment with different apertures to balance depth of field. Shoot multiple exposures to capture intricate textures. Use the self-timer or remote release to avoid vibrations. The OM-1’s portability and manual controls make it perfect for capturing small subjects with exceptional clarity.
9.3. Sports and Action Photography
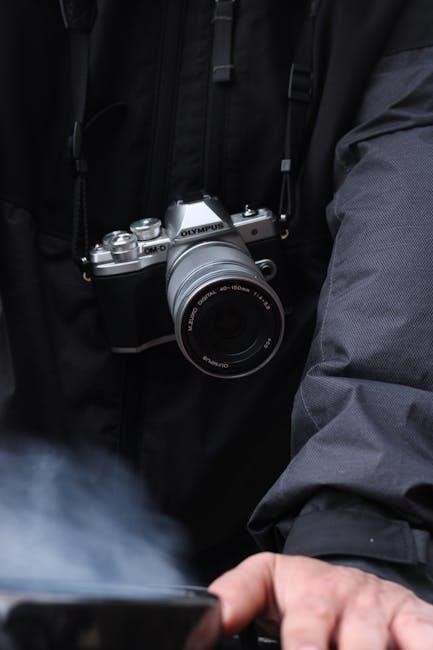
The Olympus OM-1 is well-suited for sports and action photography, offering precise manual controls for capturing dynamic moments. Use fast shutter speeds to freeze motion and ensure sharp images. The camera’s compact design and durability make it ideal for handheld shooting in fast-paced environments. Experiment with telephoto or wide-angle lenses for dramatic perspectives. Continuous shooting techniques, combined with the OM-1’s responsive controls, allow you to track and frame action seamlessly. Panning and anticipation are key to conveying motion and telling a story in your shots.
9.4. Portrait and Studio Photography
The Olympus OM-1 excels in portrait and studio photography, offering precise control over aperture and shutter speed to achieve professional results. Use the camera’s manual focus for fine adjustments and the built-in metering system to balance lighting. The OM-1’s compact size and intuitive controls make it ideal for studio setups, while its compatibility with Zuiko lenses ensures sharp, high-quality portraits. Experiment with external flashes and reflectors for creative lighting effects, and utilize the mirror lock-up feature to minimize camera shake during critical shots.
Concluding, the Olympus OM-1 is a powerful tool offering versatility and precision. Master its settings, experiment with techniques, and stay updated for optimal performance. Join communities to enhance your photography journey.
10.1. Maximizing the Potential of the OM-1
To fully unlock the OM-1’s capabilities, thoroughly understand its manual and experiment with various modes and techniques. Familiarize yourself with its lens compatibility and accessories to enhance versatility. Regularly clean and maintain the camera to ensure optimal performance. Explore firmware updates for improved functionality and join photography communities for inspiration and support. By mastering these practices, you can elevate your photography and make the most of this iconic camera’s features and potential.
10.2. Continuous Learning and Experimentation
Continuous learning is key to mastering the Olympus OM-1. Experiment with different modes, such as Aperture Priority and Manual, to understand their applications. Practice with various lenses and accessories to explore their capabilities. Regularly review your photos to identify areas for improvement. Stay updated with new techniques and firmware updates to enhance functionality. By dedicating time to learn and experiment, you can fully harness the camera’s potential and consistently capture high-quality images in diverse shooting conditions.
10.3. Joining the OM-1 User Community
Joining the Olympus OM-1 user community is an excellent way to enhance your photography journey. Engage with forums, social media groups, and local meetups to connect with fellow enthusiasts. Share your work, learn from others, and gain insights into optimal camera usage. Participating in these communities can help troubleshoot issues, discover new techniques, and stay updated on the latest trends. By being part of this vibrant network, you can inspire and be inspired, fostering continuous growth and creativity in your photography.